Friday, February 5, 2016

Quilter's Fuel: Captain's Chicken

My mom had this go-to recipe when I was a kid and she didn't have a lot of time or creative energy at her disposal (usually when my sister and I were driving her nuts). It's a good comfort food that's perfect for chilly nights. She called it "Captain's Chicken", though years later she would admit that wasn't what it was originally called and she has no idea where "Captain's chicken" came from. It was originally called "spicy chicken bake" or something, but I don't know why, because there's no spiciness to it at all. Unless you add cayenne pepper. Which is something my husband does frequently.


Captain's Chicken:

1 cut up chicken (or legs and thighs)
1 tsp salt
1/2 tsp black pepper
1/3 c flour
1/2 tsp paprika
olive oil

1 medium white onion, chopped
2 cloves garlic, minced
1 medium green bell pepper, chopped
1 c. chopped celery
1 can stewed or diced tomatoes (14 oz)
1 bay leaf
1/2 tsp dried parsley
1/2 tsp dried oregano
1/2 tsp dried basil

Preheat oven to 375 degrees. In a small bowl, mix the flour, salt, pepper, and paprika. Coat the chicken on all sides with the flour mixture. Heat the olive oil in a large skillet or frying pan and brown the chicken on all sides. Place in a single layer in a large casserole dish and set aside.

Put the canned tomatoes in a food processor and pulse two or three times to chop up the tomatoes coarsely. Set aside. In same pan the chicken was cooked in, heat a bit more olive oil and cook the onions and garlic until soft, about 3 minutes. Then, add the bell pepper and celery and sautee about 5 minutes more. Add the chopped tomatoes and herbs and heat until bubbling. Pour over the chicken in the casserole dish and put the dish in the oven. Bake 30-40 minutes until bubbly and chicken reads 165 degrees on an instant-read thermometer. Serve over white rice.

Sensory toys: sound

Sound is a funny thing if you think about it. We can detect so many different frequencies and intensities with our ears. The same note can sound vastly different when played by a flute than by a cello or even a piano.

I decided to make a quick sensory shaking toy for my daughter. I got a 12-pack bead holder from my local craft store. I made sure to get the screw-top ones so it would be harder for her to open.

I also got some beads: rainbow beads and letter beads.

When I got home, I gathered some more materials: some seed beads, some metal clasps, a pipe cleaner, some lace, and a few rocks from outside.

Then I filled each one with a different material. I tried to use different things in each one, and I even filled a few with poly-fil so it would look full, but not make a sound. Just a few little things for baby to explore.

She likes it! She likes stacking and shaking them, especially the one filled with rice. She also likes putting them back in the box they came from.

Wednesday, July 8, 2015

Katy's First Orbit-Day! Invitation

I designed a baby invitation! My daughter is turning one in September, and we decided to do a space theme for the party. I'm still ironing out the details, but I want to have a round yellow cake that will be the sun, and then 8 cupcakes designed like the planets. Hopefully I'll be able to make this all myself. We're on a budget, so we really can't afford to spend a lot on food and decorations. As long as our guests have fun and enjoy themselves, we're going to call it a success.

Anyways, here are the invites! I'm really excited. My little girl is totally a space cadet. We watched a lot of star trek while I was pregnant with her.


Saturday, June 20, 2015

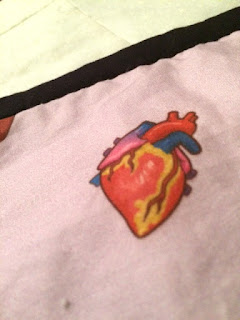
Quilted Anatomy: decorative organ quilt

Hey All! I put some of the paper pieced organs I've made over the last few months together to make a mini-quilt. It's hard to believe that I only started sewing a year ago. I've certainly progressed far! I really enjoy quilting, and I love making quilts that reflect my interests. Hope you guys enjoy these!


I even used some of the fabric I designed on spoonflower!


I'm really pleased with how this quilt turned out. Next I've got to do some more organs, and maybe a whole system!

Sunday, June 7, 2015

Quilted Anatomy: Lungs

Hello all! I'm continuing my series on quilted anatomy. This time, I give you: Lungs!


I wanted to make sure the colors would match the first two I made (P.S. I made a kidney), so I laid out my fabric and picked the colors I thought matched lung color IRL and also the nice palette I have going with the heart and kidney. In real life, the lungs are a bright salmony-pink color, almost neon. They're fantastic to look at.

Then, I had to cut up the pattern I made based on one of my drawings. The trachea was probably going to be the hardest, so I started there. I had a nice batik that makes a really good ligament color.

You can see the garden from my craft room

About halfway through, I realized the step between main color and shadow was way too steep. So I decided to start over, adding an extra color with fabric I got from The Stitchery.


Much better!
 
Here it is with the other two. I think it turned out great! I'm really excited to do more organs. I'm working on a pattern for a Uterus and a Liver, but I also want to do a brain and the cross-section of an eye. We'll see what happens next!


Non-quilting: Building Garden boxes

I've always loved growing vegetables. When I was younger, my parents didn't have a good backyard to grow a nice veggie patch, so I contented myself with growing tomatoes and beans in pots. In college, I expanded those pots to backyard porches and also grew cucumbers and squash using the back porch railings as trellises. Now that I'm grown up with a house that has a nice open backyard, I decided to grow a lot of veggies this year.

Only, I don't have a lot of money, and garden boxes are expensive.

However, there is this great place about 30 minutes from me that buys and sells old wood pallets. You know, the kind on which big stores get their shipments? So I cleared out the back of the mini-van and got about 5 of them for $5 a piece. Not too shabby.

Then I used a pry bar, hammer and reciprocating saw to break them down and build them into garden boxes.

I also used 2" square wood dowels as corner pieces for added stability and screwed the boards two deep into a square shape. They turned out pretty well.


So far, I've planted tomatoes, winter and summer squash, kale, peppers, okra, cucumbers, onions and beans. I'm also growing borage, thyme and sage as ecological pest controls. They're supposed to repel or confuse a variety of garden pests. Sunflowers and morning glories also are great at attracting predatory bugs which will eat the pests. I used this book to make sure everything was going to get along in their new homes (example: onions and beans don't go together). In fact, if you're planning on making a garden plot, I highly recommend making sure all of your plants will go well together. It will save you a lot of hair tearing-out in the future. I'm looking forward to a tasty summer!


Thursday, February 26, 2015

Quilted Anatomy: Heart

So I've had this idea in my mind for a while - I want to quilt anatomically correct organs. It combines my background as a medical illustrator with my love of quilting. I spent a loooong time making my own paper piecing pattern of a heart (from one of my illustrations) and trying to get it down just right. It took a lot of tries to make the pattern, and I ended up having to chop the pattern into about 20 different sections and piece those all together individually. I made about a million mistakes and the first one I made had terrible colors. This is the second one I made. I increased the size about 50% and chose some better colors than the first (not posted here. Never will be).
materials all ready to go!


I think it turned out pretty well, considering how many pieces it ended up being. I missed part of the top left pulmonary vein over there, but I can applique it back on. I'm thinking of embroidering on the cardiac vessels next...